[380 pts]
Type/hits Speed Turns Shields Armour Turrets
Battleship/ 12 20 cm 45 3 5+ /6+ front 3
Armament Range/Speed Firepower/Str Fire Arc
Prow Torpedoes 30 cm 2D6+3 front
Port gunz battery 30 cm D6+4 left
Stbd gunz battery 30 cm D6+4 right
Port heavy gunz battery 15 cm 6 left
Stbd heavy gunz battery 15 cm 6 right
Aft torpedoes 30 cm D6+2 rear
Red Orktober is equiped with Extra Power Fields (included in profile) and Mega-armoured Boarding Parties (giving it an additional +1 modifier on boarding). It is led by the infamous Kaptin Morkuz Ramiuzz (rules below).
Red Orktober can fire normal and boarding torpedoes.
Kaptin Morkuz Ramiuzz
Leadership: 7
Re-rolls: 2- diz may only be uzed on Da Red Orktoba’, and no otha re-rollz may be uzed on Da Red Orktoba’
Famuz Freebooter: Kaptin Morkuz Ramiuz iż da only Kaptin on bord diz ship. The ship has all the normal bonuses of having a Ork Warlord on board (and thus may not buy another Warlord for this ship), with the following exceptions: Ramiuz can never be the Fleet Commander, Da Red Orktober’s crew may never be exchanged for another crew.
Under Da Kaptinz (blind) Eye - Ramiuzz pu(ni)shes the crew beyond any limit, which means they are a very proficient (for orks), if somewhat tired crew . This means that when under the Kaptin’s gaze they will work their hands to the bone, but on other occasions they just won’t give a damn.
For every successful Ld check, the ship suffers a -1 penalty to it’s leadership. On the other hand, every unsuccessful Ld check means the ship gets a +1 leadership bonus. These do stack up, so keep count.

Pokazywanie postów oznaczonych etykietą Orks. Pokaż wszystkie posty
Pokazywanie postów oznaczonych etykietą Orks. Pokaż wszystkie posty
piątek, 26 listopada 2010
środa, 13 października 2010
Van Burren's Painting Report: Weathering of Ork Trukks
Van Burren here,
I finally managed to find the time to write up the report of my latest painting escapade. This time we will take a look at everyone's favorite four wheeled ramshackle box of exploding death, the Ork trukk.
I know that you all wish you had entire 5000 point armies painted to Golden Daemon standards, yet that not being the case, we have to make due with the skill AND time (there is never enough of it, is there?) we have. Thus, last time we concentrated on very general painting techniques that are quick and easy and give fairly good visual results for organic characters. This time around the report will focus on the quick AND easy weathering, for that touch of realism.
The trukk model is, unlike what you most non-orkers think, quite an elegant and complicated machine. The only mekanikal bitz that are missing is an operational engine to start zooming about for real (well, ok, I AM EXAGGERATING, but the detail put into the engine block, suspension and transmission is amazing). The only complaint I have is that you seldom get to see all this goodness as the trukks usually end up exploding before anyone has a chance to say "Oh, that's ne..!". On the other hand, the trukk has a lot of flat surfaces with mixed texturing. The flat surfaces make for good contrast to the machine bits and can be used to add a lot of personalization to the trukks. All in all, this is a really fun model to build, convert, and paint.
Strangely enough, the ork technology of the 40-first millennium is very close to ours, and so it is fitting to use our trukks as reference.
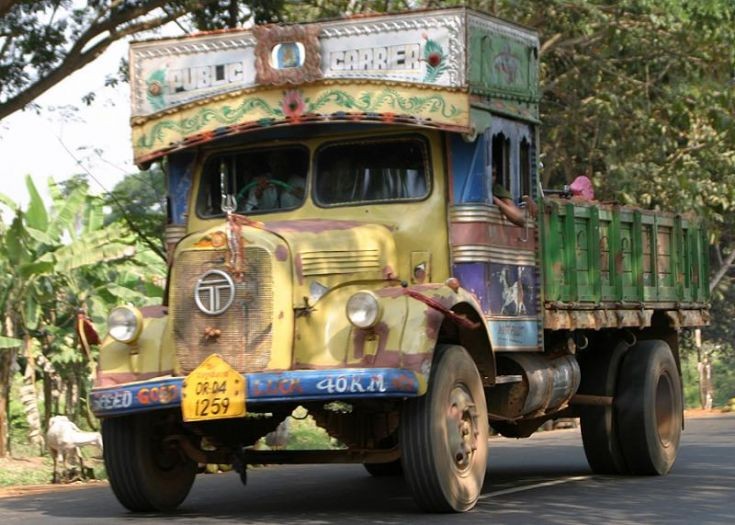
Ork Trukk circa 1996
Take a look at the picture above. Notice the rust all over the unpainted metal and eating away at the paint. Also of import is the dust on the sides of the tiers. For even more reference pictures just do an image search for truck + dirty + panties.
For my particular trukks I was aiming for the look of a WWII German half-track inbred with a garbage bin.
Let's get down to the painting table.
I started off by priming my trukks and adding a single coat of paint for, well, the paint.
 Nothing special there. Next, I painted all the metallic parts with boltgun metal. Here comes the INTERESTING part: after the paint dries, I use a mix of 2/3 Tin Bitz and 1/3 Dark Flesh and a bunch of water to create a wash. This is my "rust" wash. Notice that we are going to apply it on bare boltgun metal. The question that we have to ask ourselves is w-h-e-r-e will the rustiest bits be and where we will have no rust.
Places where rust accumulates:
- Unpainted metal exposed to water
Places where metal is less likely to accumulate:
- Moving bits
- Hot bits
- Very dry bits
- Smokey bits
- Oiled bits
- Touchy bits (handles and some such)
Following this short guide and our reference pictures, we apply more-less-none of the wash to the metal bits on the model.

After the wash is completely dry I applied a black wash to the metal bits to add some cheap shading. At this step I also applied a wash to the painted parts using a mix of black and dark green. Once THAT dries, I used some mythril silver to highlight areas where the metal is more polished.
Places where the metal will be the shiniest are any areas that will be often rubbed by the orks. As they are not likely to be actually cleaning anything, these will only include the service areas. I also used it to add edge highlights to the rest of the metal, for the pop-effect. Look at the picture below and notice how I put my mythril where my mouth is :P
 The next little step was to dry brush highlights on the Paint as well as adding some white edge highlights to emphasize the straight edges.
 Once we have the paint (and whenever I say the paint, I mean the Paint) ready, it is time for some weathering on it.
Digressing....
Long, long time ago, in a land far away, there lived... Bolt and Rivet. Bolt and Rivet were laying happily in dump land when suddenly a big green tornado of teeth and wrenches took them far away. Where he screwed both of them. After the screwing, they were covered under a thick layer of icky paint. The Bolt and the Rivet thought that there life was over, as they were away from water and air, but it was not so. Soon enough they found themselves being jerked ... and vibrated... until they became loose and the paint cracked around Rivet. When that happened water seeped in between them and they started to ... oxidate.
To simulate this I went over all the screw heads under the paint and applied some rusting (you can use the same wash as before). Use as much as you want, just remember to highlight the bolt once you are done to create a nice contrasting effect.
 Ok, time for another effect. But before we do that let's paint in some of the other details not related to weathering. Now. ... Mud. ... Orks love mud... it reminds them of childhood. To make mud I looked to my spice cabinet. Ground cinnamon! Looks good. Take the cinnamon (or any other fine powdery condiment) and mix it with white glue and the color of your own personal mud. The cinnamon will absorb it all and create a thick paste that you can now apply wherever mud naturally goes... which is everywhere. Take special "care" of places where the wheels are, where orks move about (yeah, they like mud), and any other spot that will have contact with the ground.
In this case it was the wheels, anything near the wheels, the ramming bit, the loading area, and the seats.... oh, wait, that's not mud.
 Once all that is finished. We can add some dusting. A very fine wash applied sparingly bottom up on the vehicle. Dust accumulates everywhere but the closer to the ground, the more of it will be.
 Although we are done, there are few more touches I want to show you.
Chipped paint. Using a sponge dabbed in black paint I rubbed it wherever the paint would come into contact with some scratchy bits and then painted the inside of the black with mythril, as can be seen on the next photo.
 I used a toothbrush to add a spatter effect of muddy water on the sides of the truck and of a mark of an unfortunate road blocker on the front of the truck.
 On the previous picture on the ram, and on the next one, on the wheels, check the mythril marks showing where the dirt/rust/poop/'umies got recently rubbed off.
 Other interesting things to note:
Sooty engine block and exhausts.
Rubbed handles.
Rockets, being "disposable" do not show any aging.
Where did the other trukk go?
I hope all of this will be helpful to getting your weathering done in an hour or two (as opposed to leaving your model outside the window for a year).
Allright, that's it for now! May the emperor protect.
I finally managed to find the time to write up the report of my latest painting escapade. This time we will take a look at everyone's favorite four wheeled ramshackle box of exploding death, the Ork trukk.
I know that you all wish you had entire 5000 point armies painted to Golden Daemon standards, yet that not being the case, we have to make due with the skill AND time (there is never enough of it, is there?) we have. Thus, last time we concentrated on very general painting techniques that are quick and easy and give fairly good visual results for organic characters. This time around the report will focus on the quick AND easy weathering, for that touch of realism.
The trukk model is, unlike what you most non-orkers think, quite an elegant and complicated machine. The only mekanikal bitz that are missing is an operational engine to start zooming about for real (well, ok, I AM EXAGGERATING, but the detail put into the engine block, suspension and transmission is amazing). The only complaint I have is that you seldom get to see all this goodness as the trukks usually end up exploding before anyone has a chance to say "Oh, that's ne..!". On the other hand, the trukk has a lot of flat surfaces with mixed texturing. The flat surfaces make for good contrast to the machine bits and can be used to add a lot of personalization to the trukks. All in all, this is a really fun model to build, convert, and paint.
Strangely enough, the ork technology of the 40-first millennium is very close to ours, and so it is fitting to use our trukks as reference.
Ork Trukk circa 1996
Take a look at the picture above. Notice the rust all over the unpainted metal and eating away at the paint. Also of import is the dust on the sides of the tiers. For even more reference pictures just do an image search for truck + dirty + panties.
For my particular trukks I was aiming for the look of a WWII German half-track inbred with a garbage bin.
Let's get down to the painting table.
I started off by priming my trukks and adding a single coat of paint for, well, the paint.
 Nothing special there. Next, I painted all the metallic parts with boltgun metal. Here comes the INTERESTING part: after the paint dries, I use a mix of 2/3 Tin Bitz and 1/3 Dark Flesh and a bunch of water to create a wash. This is my "rust" wash. Notice that we are going to apply it on bare boltgun metal. The question that we have to ask ourselves is w-h-e-r-e will the rustiest bits be and where we will have no rust.
Places where rust accumulates:
- Unpainted metal exposed to water
Places where metal is less likely to accumulate:
- Moving bits
- Hot bits
- Very dry bits
- Smokey bits
- Oiled bits
- Touchy bits (handles and some such)
Following this short guide and our reference pictures, we apply more-less-none of the wash to the metal bits on the model.

After the wash is completely dry I applied a black wash to the metal bits to add some cheap shading. At this step I also applied a wash to the painted parts using a mix of black and dark green. Once THAT dries, I used some mythril silver to highlight areas where the metal is more polished.
Places where the metal will be the shiniest are any areas that will be often rubbed by the orks. As they are not likely to be actually cleaning anything, these will only include the service areas. I also used it to add edge highlights to the rest of the metal, for the pop-effect. Look at the picture below and notice how I put my mythril where my mouth is :P
 The next little step was to dry brush highlights on the Paint as well as adding some white edge highlights to emphasize the straight edges.
 Once we have the paint (and whenever I say the paint, I mean the Paint) ready, it is time for some weathering on it.
Digressing....
Long, long time ago, in a land far away, there lived... Bolt and Rivet. Bolt and Rivet were laying happily in dump land when suddenly a big green tornado of teeth and wrenches took them far away. Where he screwed both of them. After the screwing, they were covered under a thick layer of icky paint. The Bolt and the Rivet thought that there life was over, as they were away from water and air, but it was not so. Soon enough they found themselves being jerked ... and vibrated... until they became loose and the paint cracked around Rivet. When that happened water seeped in between them and they started to ... oxidate.
To simulate this I went over all the screw heads under the paint and applied some rusting (you can use the same wash as before). Use as much as you want, just remember to highlight the bolt once you are done to create a nice contrasting effect.
 Ok, time for another effect. But before we do that let's paint in some of the other details not related to weathering. Now. ... Mud. ... Orks love mud... it reminds them of childhood. To make mud I looked to my spice cabinet. Ground cinnamon! Looks good. Take the cinnamon (or any other fine powdery condiment) and mix it with white glue and the color of your own personal mud. The cinnamon will absorb it all and create a thick paste that you can now apply wherever mud naturally goes... which is everywhere. Take special "care" of places where the wheels are, where orks move about (yeah, they like mud), and any other spot that will have contact with the ground.
In this case it was the wheels, anything near the wheels, the ramming bit, the loading area, and the seats.... oh, wait, that's not mud.
 Once all that is finished. We can add some dusting. A very fine wash applied sparingly bottom up on the vehicle. Dust accumulates everywhere but the closer to the ground, the more of it will be.
 Although we are done, there are few more touches I want to show you.
Chipped paint. Using a sponge dabbed in black paint I rubbed it wherever the paint would come into contact with some scratchy bits and then painted the inside of the black with mythril, as can be seen on the next photo.
 I used a toothbrush to add a spatter effect of muddy water on the sides of the truck and of a mark of an unfortunate road blocker on the front of the truck.
 On the previous picture on the ram, and on the next one, on the wheels, check the mythril marks showing where the dirt/rust/poop/'umies got recently rubbed off.
 Other interesting things to note:
Sooty engine block and exhausts.
Rubbed handles.
Rockets, being "disposable" do not show any aging.
Where did the other trukk go?
I hope all of this will be helpful to getting your weathering done in an hour or two (as opposed to leaving your model outside the window for a year).
Allright, that's it for now! May the emperor protect.
czwartek, 16 września 2010
Zbieranie floty do Battlefleet Gothic
"Zagrałem bitwę w BFG, podoba mi się – no tak, ale co dalej?- nie mam floty."
albo "Podoba mi się system, ale skąd mam wziąć statki?"
Istnieją zasadniczo trzy możliwości uzyskania statków do BFG:
Zakup używanych
– wariant dla tych którzy mają mniej pieniędzy a więcej czasu. Nie będę owijał w bawełnę, kupić używaną flotę w Polsce nie jest łatwo- na allegro raz na parę miesięcy się coś pojawia. Najlepszym miejscem na zakupy flot używanych wydaje się być Brytyjski e-bay.
Część wystawiających oferuje możliwość wysłania poza granice Wielkiej Brytanii, a nawet jeśli nie- to zawsze można przecież znaleźć znajomego który otrzyma naszą paczkę w UK i przywiezie ją nam kiedy będzie wracał do Polski. W zależności od ilości statków we flocie, stanu oraz rasy ceny oraz pory dnia o której kończy się aukcja ceny używanych modeli wahają się w granicach 30-100% wartości nowych okrętów. Dla popularnych flot takich jak Chaos i Imperium przeciętnymi cenami jest ok. 40-60% wartości nówek. Dla eldarów jest to ok. 55-70%.
Sam skorzystałem z tej opcji aby kupić swoją flotę Chaosu.
Zakup nowych
– statki są oczywiście dalej dostępne przez mail order od GW lub z Forge World'a
Z jednej strony pojedyncze okręty nie są tanie (30-100zł dla okrętów liniowych- Capital Ships, lub jakieś 40zł za blister z 3 eskortowcami), jednak każdy właściwie okręt (lub w przypadku eskortowców zawartość blistera- 3-4 statki) stanowi odpowiednik całego oddziału do wh40k lub regimentu do whfb. Ogólnie rzecz biorąc dla większości flot BFG stosunek punkty/złotówki jest znacznie lepszy niż w wh40k lub whfb.
Są też inni producenci figurek statków kosmicznych tacy jak np. Spartan Games.
Zrobienie statków samemu
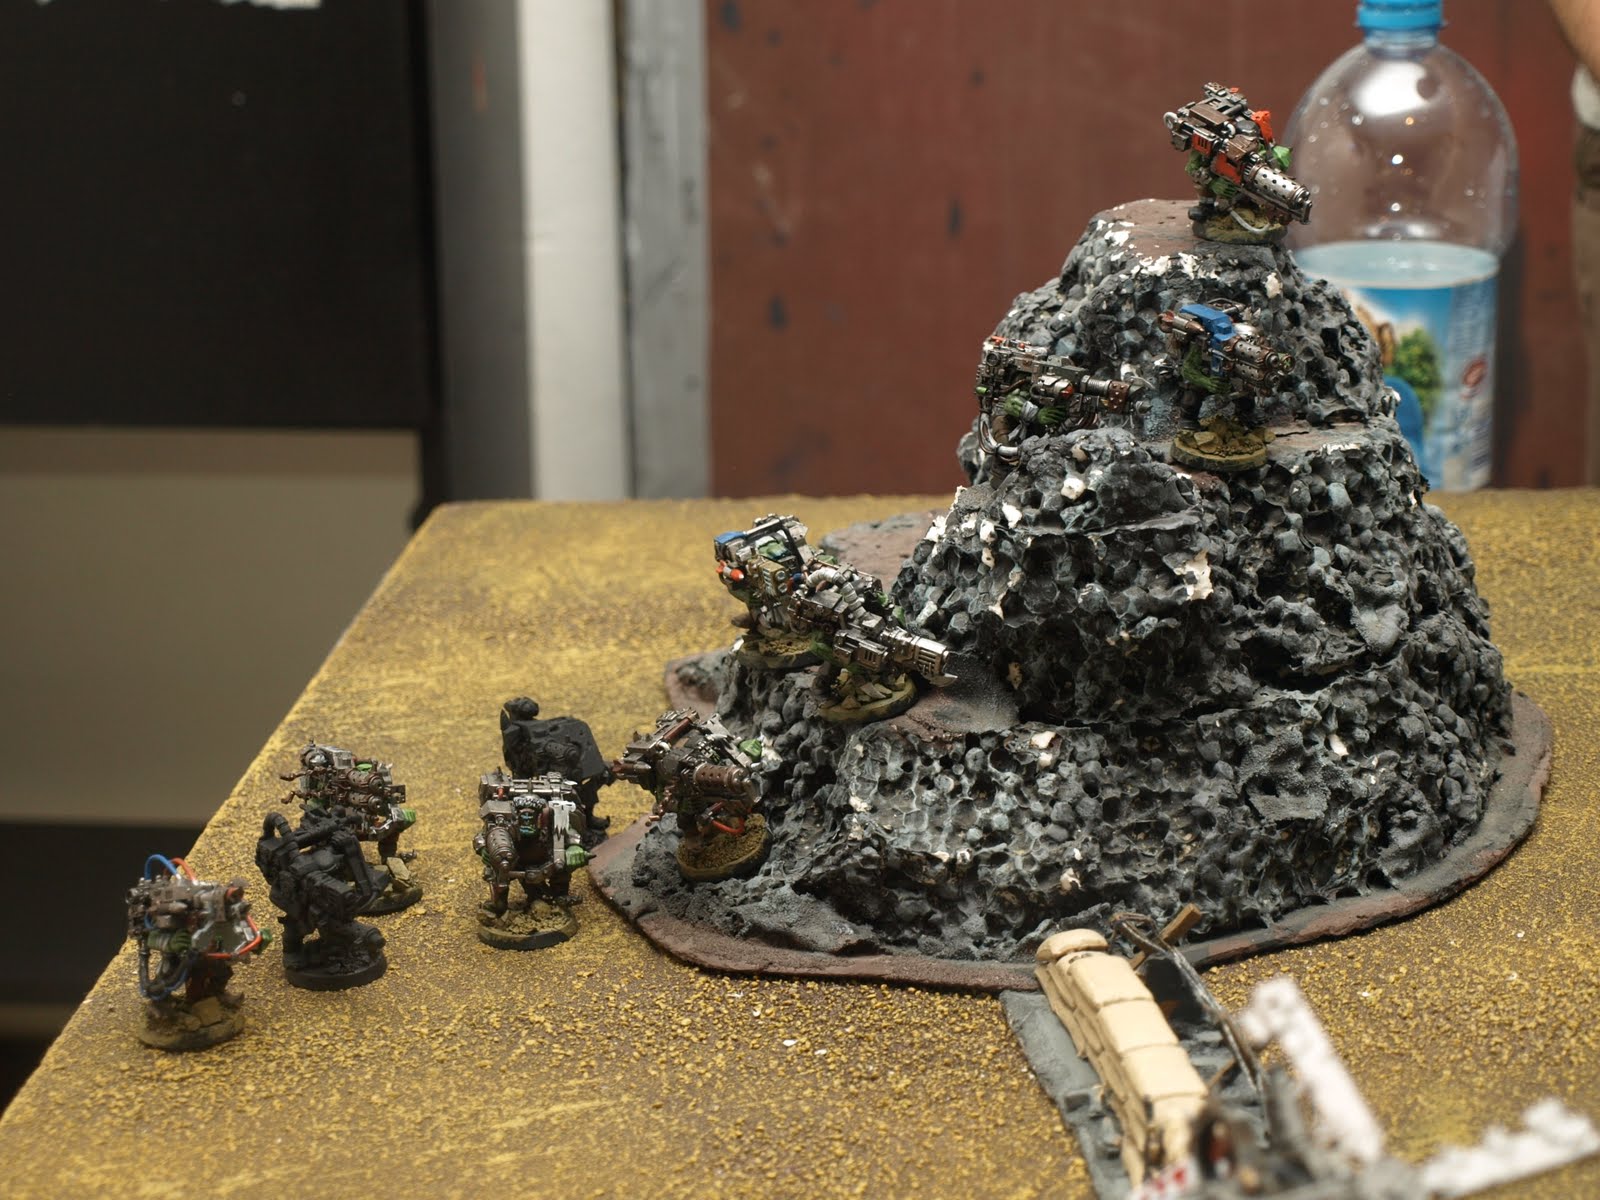
– dla części flot ze względu na to jak ich statki wyglądają może być to nawet lepszy pomysł niż zakup. Zwłaszcza jeśli chodzi o Orki i Tyranidów (lubię wygląd oryginalnych statków) są to floty które można w całości zbudować z resztek po modelach do wh40k i innych kawałków (elementy statków chaosu i imperium, elementy układów elektronicznych [masz starą kartę graficzną- zamień ją w krążownik!]) w przypadku orków). Przykłady jak ludzie budują takie floty są łatwe do znalezienia w internecie:
Orki
http://www.youtube.com/watch?v=PurawAO5M7U
http://smg.photobucket.com/albums/v179/CELS83/BFG/?action=view¤t=orkship01.jpg
http://www.tacticalwargames.net/taccmd/viewtopic.php?f=8&t=12269
http://www.tacticalwargames.net/taccmd/viewtopic.php?f=8&t=14028
http://www.tacticalwargames.net/taccmd/viewtopic.php?f=8&t=13654
http://www.tacticalwargames.net/taccmd/viewtopic.php?f=8&t=13528
http://www.tacticalwargames.net/taccmd/viewtopic.php?f=8&t=12920
Tyranidzi:
http://www.tacticalwargames.net/taccmd/viewtopic.php?f=8&t=19055
http://www.tacticalwargames.net/taccmd/viewtopic.php?f=8&t=11146
http://album.warpshadow.com/v/HiveFleetMorboth/BFGnids/
http://thetyranidhive.proboards.com/index.cgi?action=display&board=converting&thread=12863&page=1#235538
http://www.40konline.com/community/index.php?topic=171850.0
http://www.warseer.com/forums/showthread.php?t=9283&highlight=tyranid+cruiser
http://www.warseer.com/forums/showthread.php?t=8684&highlight=tyranid+hiveship
http://www.warseer.com/forums/showthread.php?t=8126&highlight=tyranid+hiveship
albo "Podoba mi się system, ale skąd mam wziąć statki?"
Istnieją zasadniczo trzy możliwości uzyskania statków do BFG:
Zakup używanych
– wariant dla tych którzy mają mniej pieniędzy a więcej czasu. Nie będę owijał w bawełnę, kupić używaną flotę w Polsce nie jest łatwo- na allegro raz na parę miesięcy się coś pojawia. Najlepszym miejscem na zakupy flot używanych wydaje się być Brytyjski e-bay.
Część wystawiających oferuje możliwość wysłania poza granice Wielkiej Brytanii, a nawet jeśli nie- to zawsze można przecież znaleźć znajomego który otrzyma naszą paczkę w UK i przywiezie ją nam kiedy będzie wracał do Polski. W zależności od ilości statków we flocie, stanu oraz rasy ceny oraz pory dnia o której kończy się aukcja ceny używanych modeli wahają się w granicach 30-100% wartości nowych okrętów. Dla popularnych flot takich jak Chaos i Imperium przeciętnymi cenami jest ok. 40-60% wartości nówek. Dla eldarów jest to ok. 55-70%.
Sam skorzystałem z tej opcji aby kupić swoją flotę Chaosu.
Zakup nowych
– statki są oczywiście dalej dostępne przez mail order od GW lub z Forge World'a
Z jednej strony pojedyncze okręty nie są tanie (30-100zł dla okrętów liniowych- Capital Ships, lub jakieś 40zł za blister z 3 eskortowcami), jednak każdy właściwie okręt (lub w przypadku eskortowców zawartość blistera- 3-4 statki) stanowi odpowiednik całego oddziału do wh40k lub regimentu do whfb. Ogólnie rzecz biorąc dla większości flot BFG stosunek punkty/złotówki jest znacznie lepszy niż w wh40k lub whfb.
Są też inni producenci figurek statków kosmicznych tacy jak np. Spartan Games.
Zrobienie statków samemu
– dla części flot ze względu na to jak ich statki wyglądają może być to nawet lepszy pomysł niż zakup. Zwłaszcza jeśli chodzi o Orki i Tyranidów (lubię wygląd oryginalnych statków) są to floty które można w całości zbudować z resztek po modelach do wh40k i innych kawałków (elementy statków chaosu i imperium, elementy układów elektronicznych [masz starą kartę graficzną- zamień ją w krążownik!]) w przypadku orków). Przykłady jak ludzie budują takie floty są łatwe do znalezienia w internecie:
Orki
http://www.youtube.com/watch?v=PurawAO5M7U
http://smg.photobucket.com/albums/v179/CELS83/BFG/?action=view¤t=orkship01.jpg
http://www.tacticalwargames.net/taccmd/viewtopic.php?f=8&t=12269
http://www.tacticalwargames.net/taccmd/viewtopic.php?f=8&t=14028
http://www.tacticalwargames.net/taccmd/viewtopic.php?f=8&t=13654
http://www.tacticalwargames.net/taccmd/viewtopic.php?f=8&t=13528
http://www.tacticalwargames.net/taccmd/viewtopic.php?f=8&t=12920
Tyranidzi:
http://www.tacticalwargames.net/taccmd/viewtopic.php?f=8&t=19055
http://www.tacticalwargames.net/taccmd/viewtopic.php?f=8&t=11146
http://album.warpshadow.com/v/HiveFleetMorboth/BFGnids/
http://thetyranidhive.proboards.com/index.cgi?action=display&board=converting&thread=12863&page=1#235538
http://www.40konline.com/community/index.php?topic=171850.0
http://www.warseer.com/forums/showthread.php?t=9283&highlight=tyranid+cruiser
http://www.warseer.com/forums/showthread.php?t=8684&highlight=tyranid+hiveship
http://www.warseer.com/forums/showthread.php?t=8126&highlight=tyranid+hiveship
sobota, 21 sierpnia 2010


Subskrybuj:
Posty (Atom)